
Paint Does Not Hide Wall Damage — It Reveals It
Fresh paint does not cover wall imperfections — it exposes them. Nail holes, stress cracks, popped drywall screws, skim-coat ridges, and uneven texture all reflect light differently from the surrounding wall, making them more visible after painting than they were before.
This is the most costly misconception we encounter in our work across Sherman Oaks and the San Fernando Valley. A homeowner or property manager applies a new coat of paint expecting smooth, clean walls, and instead gets a surface that announces every flaw it was supposed to conceal. Paint alone cannot do that work — walls need to be properly patched and sanded first, or the finish coat will betray every imperfection beneath it.
If you are looking for the fastest possible paint job without attention to surface preparation, this is not the right resource. Wall preparation takes real time and real skill, and anyone who has seen both a rushed job and a properly prepared one can tell you the difference is not subtle. Our team has years of hands-on experience completing interior painting and wall preparation projects for homes, HOAs, property management companies, and general turnovers throughout the San Fernando Valley.
February 2026 Case Study: Repairing and Repainting Damaged Interior Walls
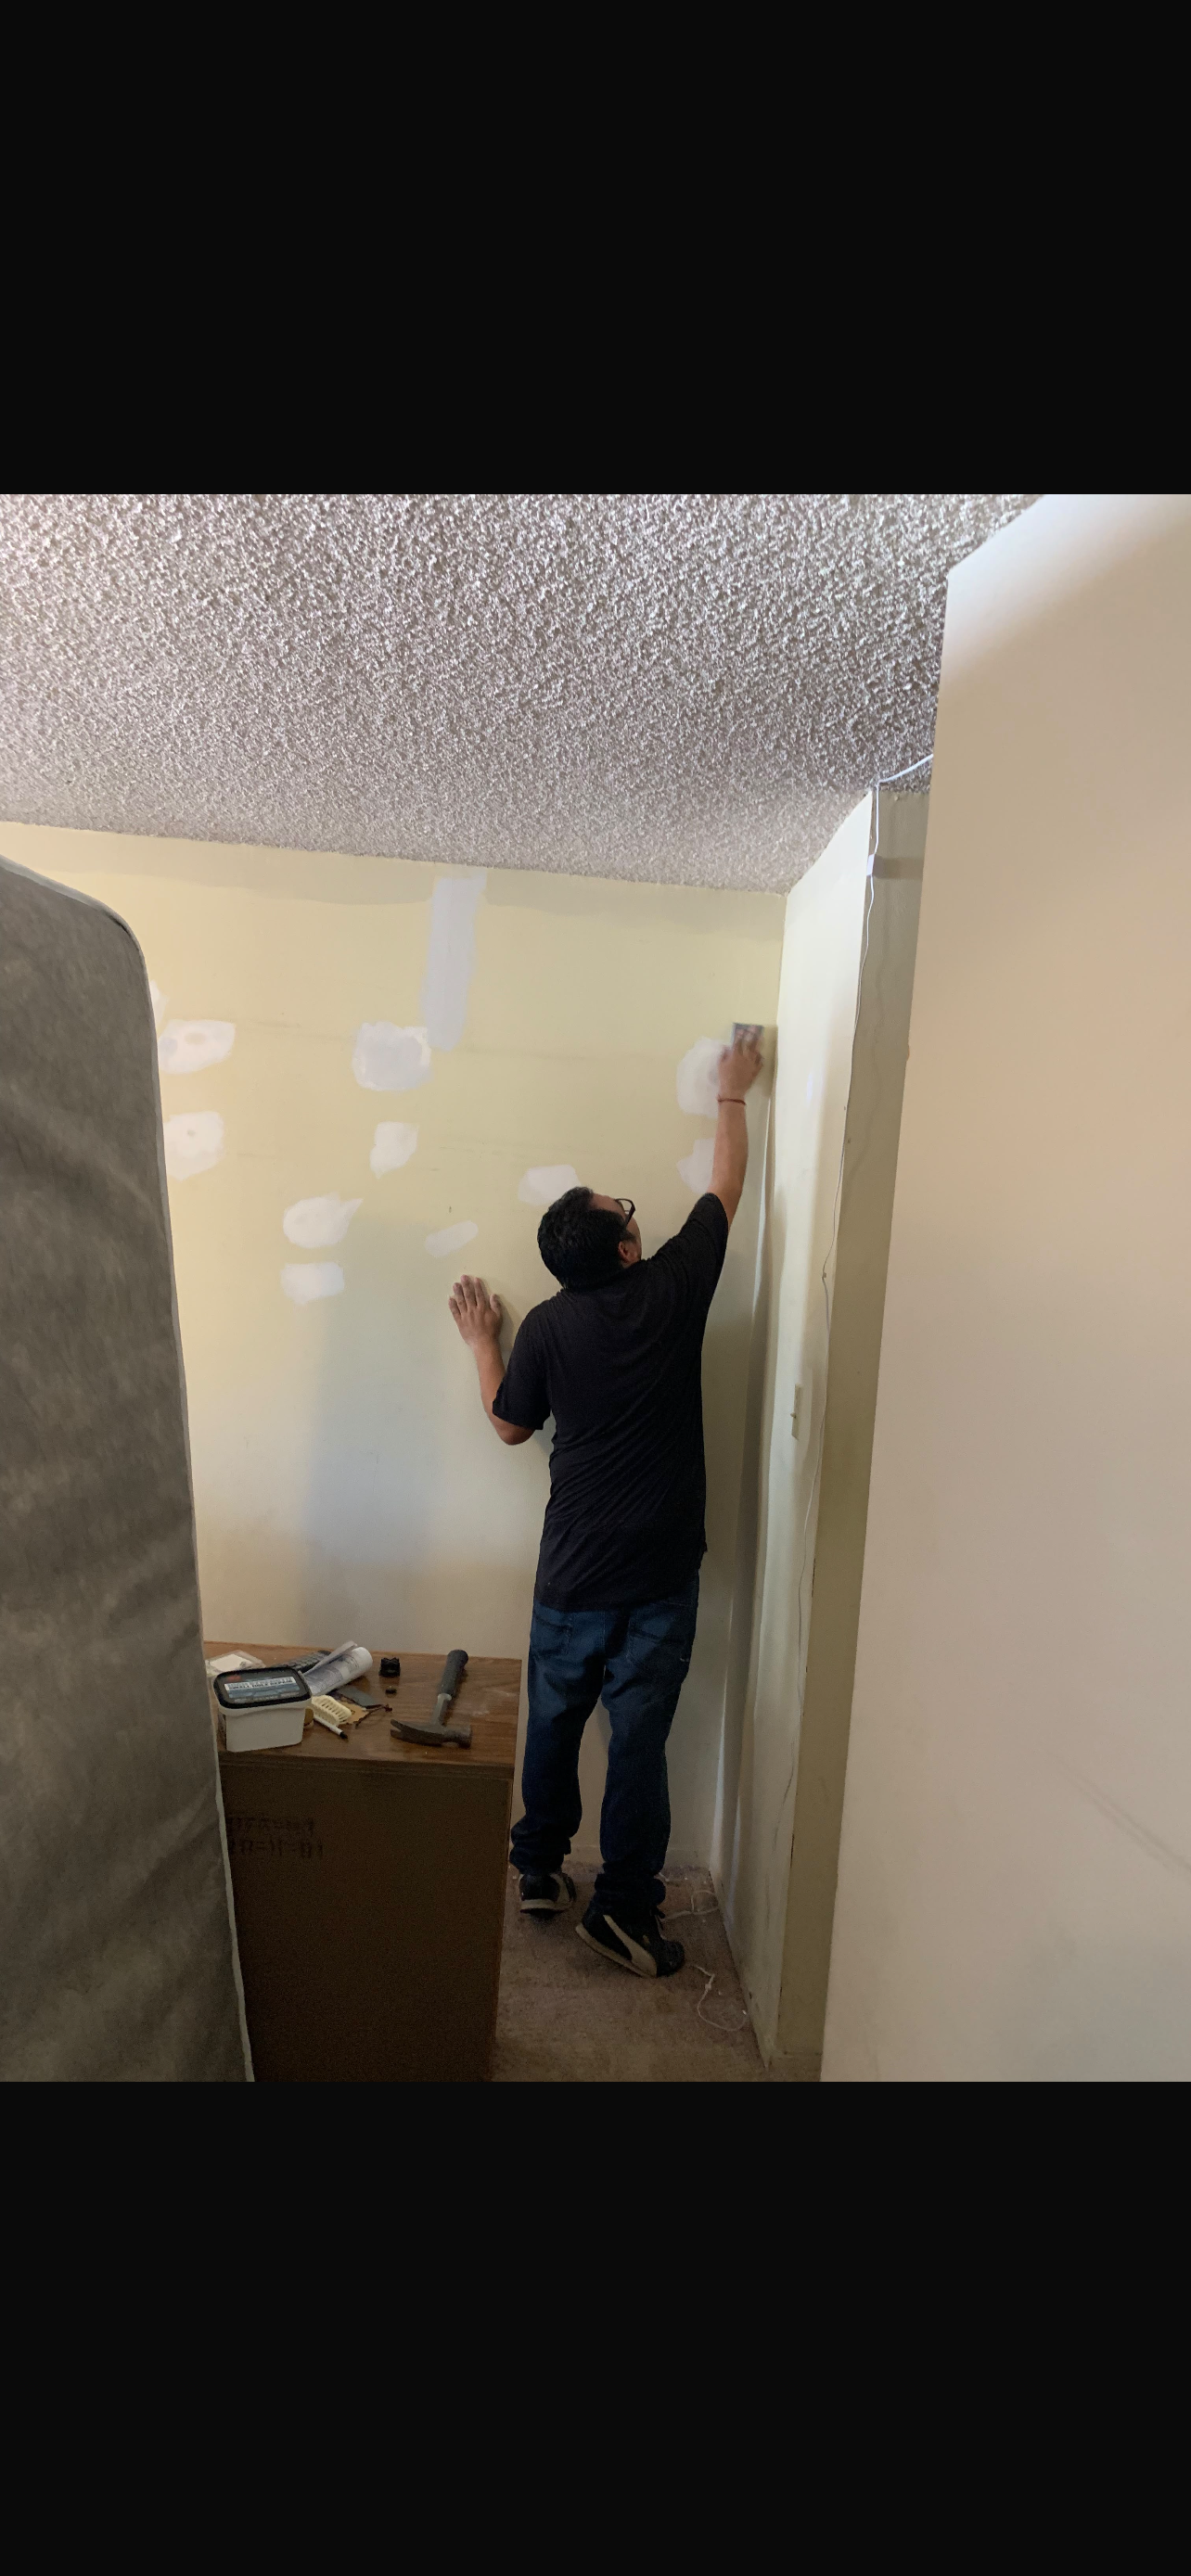
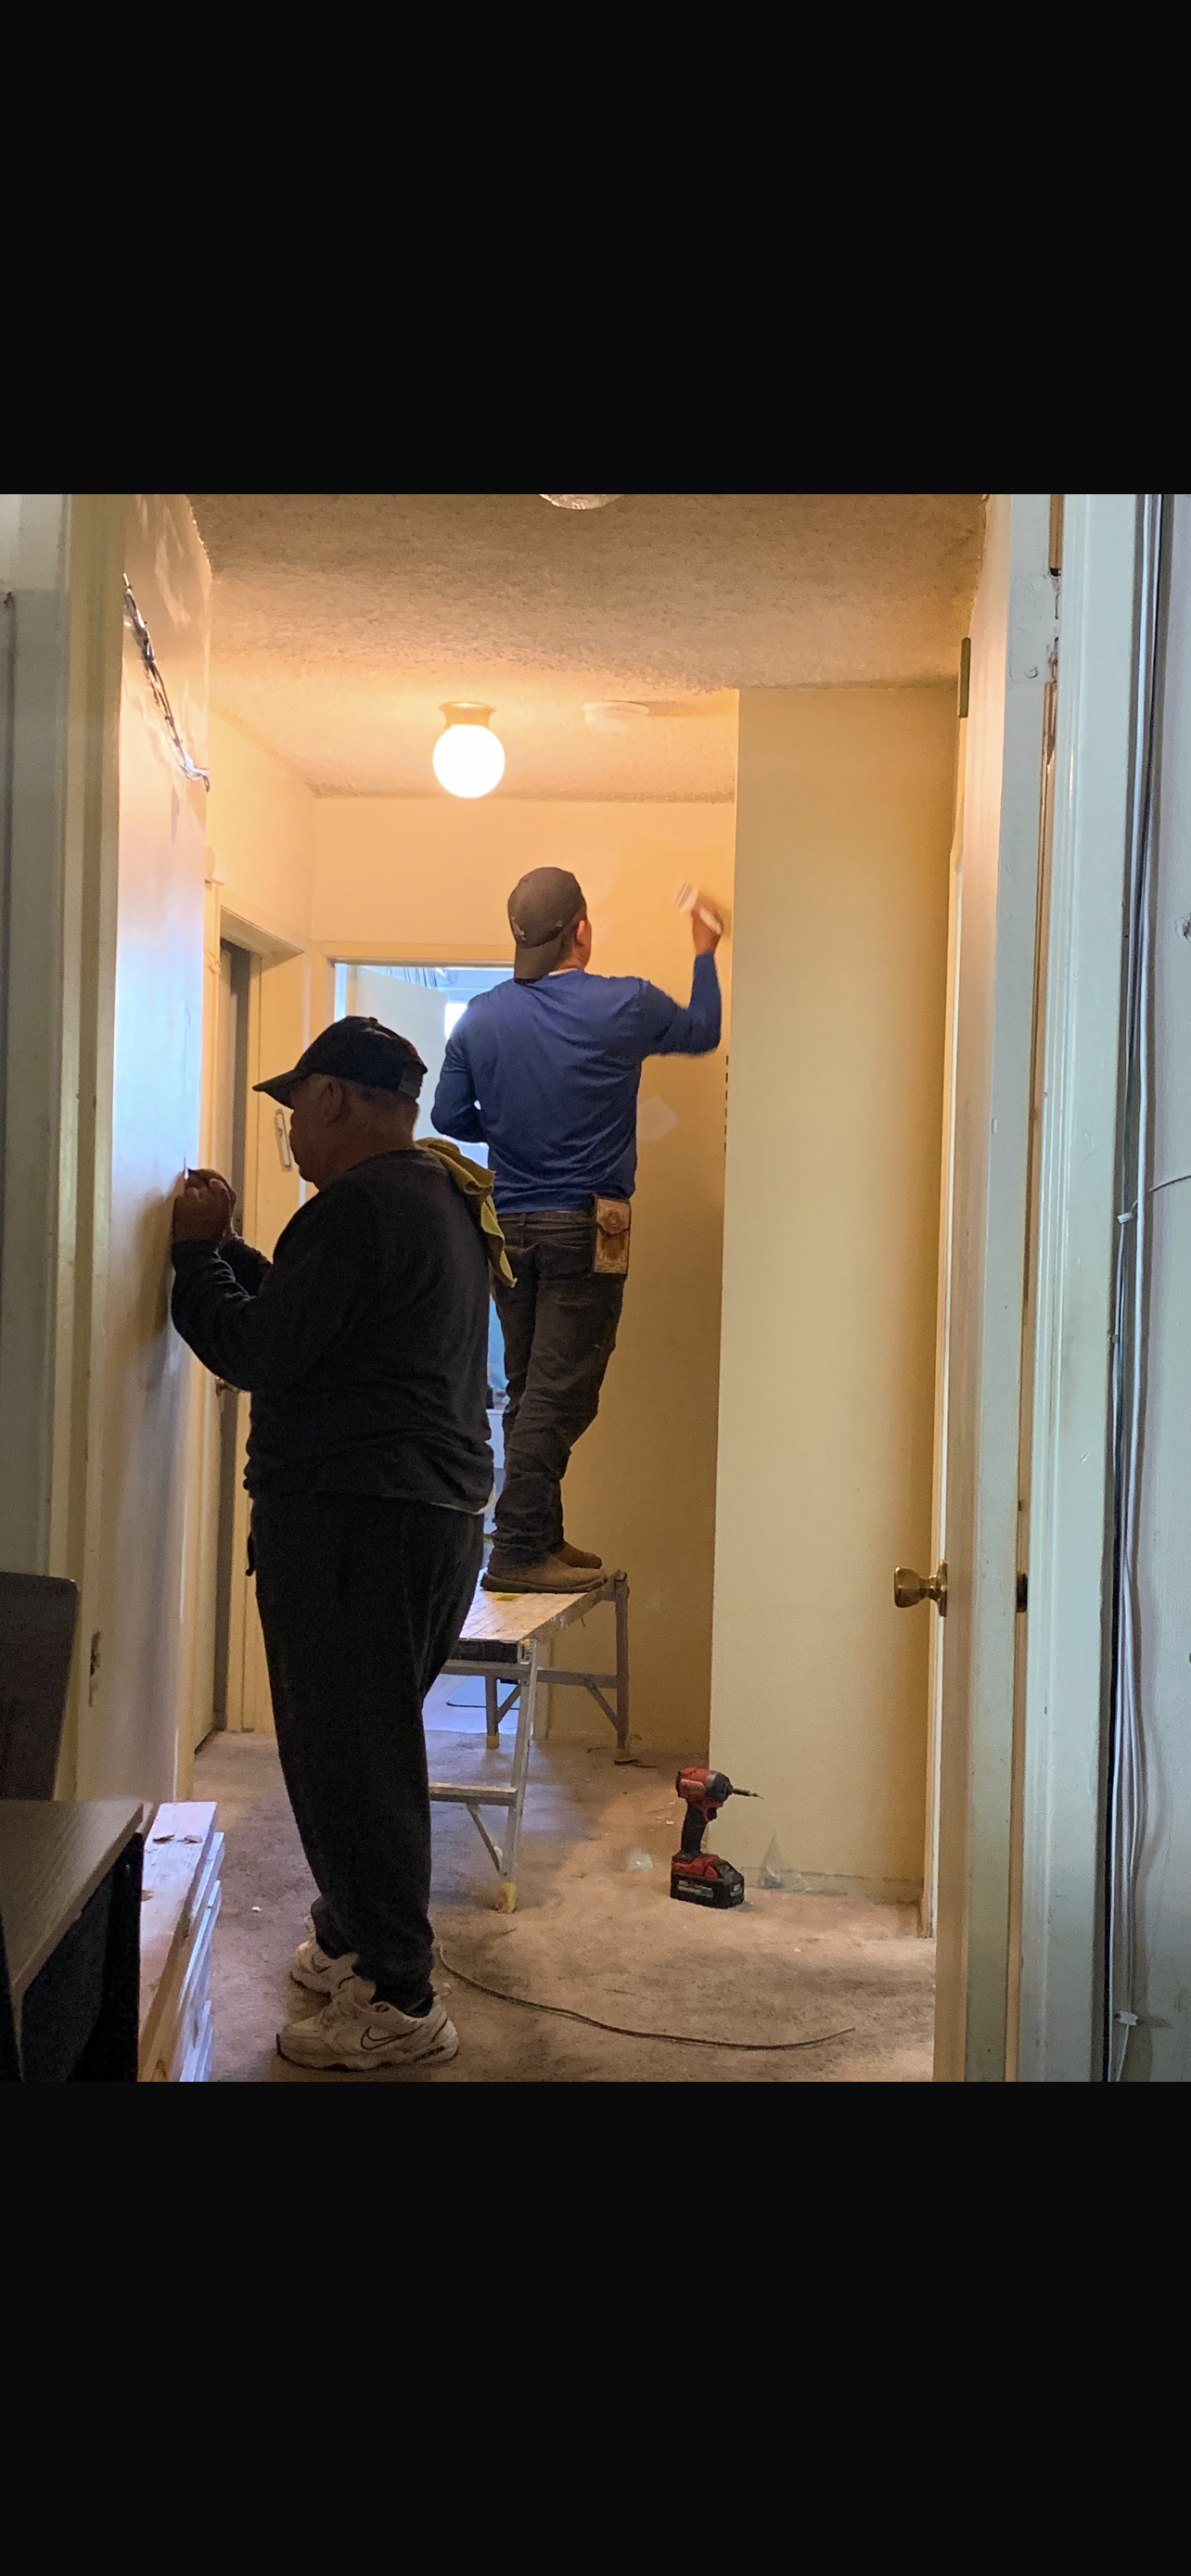
In February 2026, we completed an interior wall repair and repainting project for a property with walls showing multiple holes, dents, cracks, and uneven surfaces throughout. Painting over those conditions was never an option — doing so would have locked every flaw permanently beneath the new finish.
Our process began with a thorough inspection of every wall surface to catalog the damage before touching a single tool. We patched each hole and damaged area with the appropriate filler, then allowed all repairs to dry completely before moving to the next phase. Skipping that drying window is one of the most common shortcuts that causes patches to telegraph through paint — the patch and the surrounding wall absorb primer and paint at different rates when the repair is not fully cured.
Once dry, we sanded every patched area until it was flush with the surrounding wall, removed all dust, and applied primer to the repaired sections to equalize their porosity before the finish coat. That priming step is what closes the texture and absorption gap between a fresh patch and aged drywall.
The result was walls where no repaired area was distinguishable from the original surface. Every wall read as a single, consistent plane — smooth, clean, and professional from any angle and under any lighting condition. That outcome was only possible because the preparation was done completely, not partially.
What Proper Wall Preparation Actually Looks Like Before the First Coat
You may wonder why wall preparation takes as long as it does. Walking through each step makes that clear.
Step 1 — Full inspection. Before any materials are applied, every wall surface is examined — holes, dents, screw pops, stress cracks, hairline fractures, texture irregularities — all of it gets cataloged. Skipping this inventory means damage gets discovered mid-project, which disrupts the workflow and compromises the final consistency.
Step 2 — Patching. The right compound goes into each damaged area, with edges feathered outward into the surrounding wall. That feathering is what makes the difference between a patch that disappears and one that creates a whole new problem to solve — a repair that sits proud of the wall like a raised island is just new damage wearing different clothes.
Step 3 — Full cure before sanding. Patches must dry completely. Sanding wet or partially cured compound tears the repair, leaving a rough, uneven surface that will read through every coat of paint applied afterward.
Step 4 — Sanding and dust removal. Once cured, patched areas and any existing texture irregularities are sanded level with the surrounding wall. Thorough dust removal follows — dust left on the surface bonds into the primer and creates a gritty finish no amount of additional paint will correct.
Each step in this sequence depends on the one before it. Omitting any one of them undermines the steps that follow and compromises the finished result.
Why Priming Repaired Areas Is a Step You Cannot Skip
Primer over patched areas is not optional — it is what makes the difference between a paint job that looks professional and one that looks blotchy despite correct patching work. Joint compound and patching materials are highly porous, meaning they pull paint into the surface at a much faster rate than the surrounding aged drywall. That difference in absorption rate causes flashing — visible dull spots in the dried topcoat where the patched areas sit slightly matte against the sheen of the rest of the wall.
Skipping primer over patches is one of the most common reasons a freshly painted room still looks uneven, even when the patching itself was executed well. The flaw is not in the patch — what's actually missing is a sealed surface beneath the paint.
Spot-priming seals the porous patching material so the topcoat lays down uniformly across the entire wall surface. In some cases, where repairs are extensive or the existing wall surface has uneven sheen, priming the full wall is the more reliable approach.
In the February 2026 project, priming the repaired sections before applying the finish coat was a deliberate and non-negotiable step. That single stage is what allowed the paint to read as one consistent surface — no dull patches, no sheen variation, no evidence that any repair had ever been made. If you are ready to schedule professional interior painting that includes complete wall preparation, contact our team for a free estimate.
Types of Wall Damage We Repair Before Painting
Wall repair projects rarely involve just one type of damage. Most properties we assess present several of these categories at once, and some surfaces show all five.
Nail holes and anchor holes from artwork, shelving, and mounted fixtures appear small but cast a visible shadow under fresh paint if the filler is not sanded perfectly flush with the surrounding surface.
Stress cracks and settlement cracks are common in older San Fernando Valley homes — particularly in Northridge, Van Nuys, and Reseda, where foundation movement has had decades to work. These require a flexible filler and careful feathering; a rigid compound will re-crack as the structure continues its normal seasonal movement.
Drywall dents and impact damage from door handles and furniture moves must be built up in multiple thin layers. Filling a deep dent in a single pass causes shrinkage and leaves a subtle concave surface that paint will highlight.
Popped drywall screws and nail pops must be reset or countersunk before the area is patched. Patching over a protruding fastener guarantees the bump reappears under the finish coat within weeks.
Skim-coat ridges and texture mismatches from previous repairs require sanding and sometimes light re-texturing to match the surrounding wall. A smooth patch on a lightly textured wall is as visible as the original damage it replaced.
How Wall Prep Affects Paint Longevity, Not Just Appearance
Proper wall preparation extends how long a paint job lasts — not just how good it looks on day one. Paint applied over cracked or unsealed drywall is more likely to peel or bubble along those damage lines as the wall shifts seasonally or as moisture migrates through improperly sealed areas. A smooth, primed surface gives paint a consistent mechanical bond across the entire wall, and that bond is what determines whether a paint job holds for years or begins failing within months.
Skipping preparation to reduce upfront cost almost always results in higher total spending. When a paint job fails prematurely — peeling at crack lines, flashing at unrepaired patches, or bubbling where moisture found an unsealed entry point — the full process has to be repeated sooner than it should. The preparation that was skipped the first time still has to happen the second time, with the added cost of stripping and repainting work that should have lasted.
For property managers and HOAs overseeing multiple units in the San Fernando Valley, this matters in practical terms. Thorough wall prep between tenants reduces callbacks and touch-up costs over time. Our team has completed interior painting projects for homes, HOAs, and property management companies throughout Sherman Oaks and surrounding communities — the same discipline we bring to remodeling projects in Van Nuys applies to every surface we prepare and paint. If reducing long-term maintenance costs matters to you, call us at +1 (310) 890-4885 to discuss a proper preparation and painting scope.
Interior Painting and Wall Prep for Homes, HOAs, and Property Turnovers
The right preparation approach shifts depending on who the client is and what the walls actually need to accomplish.
For homeowners repainting a living room, bedroom, or hallway, the standard is simple: the finished walls should look genuinely renovated, not just refreshed. Rooms with significant natural light — common in Sherman Oaks and Encino homes that face south or west — show every unrepaired imperfection under afternoon sun. Patching and sanding before painting is what separates a room that looks transformed from one that looks touched up.
For HOAs, common area walls in lobbies, stairwells, and hallways absorb constant contact from residents, carts, and furniture. Those surfaces require thorough damage repair before each repaint cycle to maintain the well-kept appearance residents expect and that protects the property's value.
For property management companies handling general turnovers, wall preparation is directly tied to performance. A properly prepped and painted unit photographs better, shows better, and holds through a full tenancy without premature peeling or flashing. Cutting preparation to turn a unit faster typically means a callback before the lease ends.
Our team has completed interior painting and wall preparation work across all three of these client types throughout Sherman Oaks and the broader San Fernando Valley — including projects for homeowners in Northridge and property managers across the region. That breadth of hands-on experience informs every inspection, patch, and primer decision we make.
Neighborhoods and Properties We Serve Across the San Fernando Valley
Los Angeles Kitchen and Bathroom Remodeling is based at 4419 Van Nuys Blvd, Suite 407, Sherman Oaks, CA 91403, and serves the full San Fernando Valley for interior painting, wall preparation, and complete home renovation projects. Our Sherman Oaks location puts us within close reach of every community we regularly work in.
In Sherman Oaks, Encino, Studio City, Calabasas, and Tarzana, residential homeowners and property managers frequently call us between occupancies or as part of broader renovation scopes. These communities tend to have larger single-family homes where living spaces, hallways, and bedrooms demand a genuinely smooth finish rather than a quick refresh.
Van Nuys, North Hollywood, Reseda, and Woodland Hills have a high concentration of multi-family buildings, HOA-managed communities, and aging drywall where settlement cracks and impact damage accumulate over decades — exactly the conditions where thorough wall preparation makes the most meaningful difference in the finished result.
We have also completed interior painting and wall repair projects for properties along the Ventura Boulevard corridor, in communities near the 405 and 101 interchange, and throughout the San Fernando Valley floor. Open Sunday through Thursday from 8 AM to 6 PM, Friday from 8 AM to 2 PM, closed on Saturday. Request a free estimate to get started.
How Interior Painting and Wall Preparation Connect to a Larger Home Renovation
Interior painting is rarely a standalone project — it is almost always the final finish trade in a larger sequence of work. During kitchen remodeling, bathroom remodeling, or whole-home renovation, framing changes, drywall installation, and demolition disturb wall and ceiling surfaces that must be patched, sanded, and primed before paint can be applied. Every electrical circuit added and every plumbing rough-in relocated leaves patch points that need to be repaired and blended before the finish coat goes on.
Under general contracting, painting is scheduled deliberately after flooring, cabinetry, and tile work are complete — protecting fresh paint from trade damage is a sequencing discipline that reduces rework and keeps the project on schedule. Clients completing kitchen remodeling or bathroom remodeling in Sherman Oaks and surrounding communities can include interior painting and wall preparation under a single coordinated contract rather than hiring a separate painter after the fact.
Coordinating painting within the remodel scope means wall repairs are assessed by the same team that opened the walls — no detail about what was patched or how surfaces were modified is lost between contractors. That continuity produces a more consistent finished result throughout the entire home.
Steps to Take Before Scheduling an Interior Painting Project
Before you contact a painting contractor, a short walkthrough of your own home will make your consultation faster and your written estimate more accurate.
Step 1 — Document visible wall damage. Walk every room and note holes, cracks, dents, stains, and any areas where previous repairs look raised or discolored. Photographing each problem area before the consultation helps communicate the full scope without relying on memory.
Step 2 — Identify previously patched surfaces that were never sanded. Walls that have been patched and repainted multiple times without proper sanding accumulate uneven layers. Those areas need to be addressed before another coat goes on, or each layer compounds the irregularity.
Step 3 — Assess the lighting in each room. Rooms with strong natural light or directional artificial fixtures reveal surface imperfections far more than dimly lit spaces. The preparation standard for a sun-facing living room in Studio City or Sherman Oaks should be higher than for an interior hallway.
Step 4 — Contact Los Angeles Kitchen and Bathroom Remodeling. Our team will assess your wall conditions, explain exactly what preparation is needed, and provide a written estimate before any work begins. Call +1 (310) 890-4885 or request a free online estimate to get started.
Get a Quote for Professional Interior Painting and Wall Preparation
Proper wall preparation is not an add-on we offer for an extra charge — it is the foundation of every interior painting project we deliver. Leaving it out produces results that fail faster and look worse under any real lighting condition, so it is built into our process from the start, not negotiated away to hit a lower number.
The most common concern we hear is cost uncertainty. Our written estimates address that directly: the full scope of wall inspection, patching, sanding, priming, and finish painting is itemized before any work begins. You know exactly what is covered before we schedule a single day on site.
Free online estimates are available for interior painting and wall preparation projects throughout Sherman Oaks and the San Fernando Valley. Send us photos of your walls and a brief description of the conditions, and we will return a detailed written quote. There is no obligation, and you are not committing to anything by asking for a number.
Reach us by phone at +1 (310) 890-4885. Open Sunday through Thursday from 8 AM to 6 PM, Friday from 8 AM to 2 PM, closed on Saturday. You can also submit a request online at any time to get the process started.
Project Photos
Frequently Asked Questions
7 questions answered
How long does wall patching and sanding add to an interior painting project?
The time required depends entirely on how much damage the walls have and how large the space is, but proper preparation cannot be rushed without compromising the results. Each patch must dry fully before sanding — shortcutting that drying window causes patches to telegraph through the finished paint. A project with extensive holes, cracks, and dents will take meaningfully longer to prepare than walls in good condition, and that extra time is what separates a smooth, professional result from a blotchy one.
Will I be able to see patched areas through the new paint?
Patched areas will show through new paint if they are not properly sanded flush and primed before the finish coat is applied. Joint compound and patching materials are more porous than the surrounding drywall, so they absorb paint at a different rate and create dull, flat spots — called flashing — against the sheen of the rest of the wall. Sanding the patch level and sealing it with primer before painting eliminates that absorption difference and makes the repaired area indistinguishable from the original surface.
What types of wall damage need to be repaired before interior painting?
Common wall damage that must be repaired before painting includes nail holes, drywall screw pops, stress cracks, hairline fractures, larger impact holes, dents, and areas of uneven or damaged texture. Painting over any of these without patching first does not hide them — it draws attention to them because fresh paint creates a uniform reflective surface that makes shadows and dips more visible than they were before. Each type of damage has an appropriate repair method, and the edges of every patch need to be feathered into the surrounding wall so there is no raised border left behind.
Can I patch and sand walls myself before painting, or should I hire a professional?
Basic nail holes can be filled by most homeowners, but walls with multiple types of damage — cracks, dents, screw pops, and texture irregularities — require experience to repair invisibly. The most common DIY mistakes are not feathering patch edges wide enough, sanding before the compound is fully cured, and skipping primer over repaired areas, all of which cause the repairs to remain visible through the finished paint. For rental properties, HOA units, or any space where the final appearance matters, professional preparation produces a result that holds up under close inspection and varied lighting.
Does the type of paint sheen affect how visible wall imperfections are?
Higher-sheen finishes like eggshell, satin, and semi-gloss reflect progressively more light, which means they are less forgiving of surface imperfections than flat paint. Any dip, bump, or uneven patch that might be subtle under flat paint becomes more noticeable under eggshell, and especially pronounced under satin or semi-gloss finishes. This is exactly why thorough sanding to a truly flush, even surface matters more on walls that will receive a higher-sheen topcoat.
How do professionals make a patched wall look seamless after painting?
A seamless patch requires the repair material to be feathered out gradually so the edges blend into the surrounding wall rather than creating a raised border, then sanded completely flush once dry, then primed to match the porosity of the surrounding surface before the finish coat goes on. Any one of those steps done incorrectly — edges not feathered, sanding done too early, primer skipped — leaves a visible trace of the repair in the finished paint. The goal is for every repaired area to read as part of a single, continuous wall surface under any lighting angle.
Is interior wall preparation and painting a service Los Angeles Kitchen and Bathroom Remodeling offers?
Interior wall repair and painting is part of the home renovation services offered by Los Angeles Kitchen and Bathroom Remodeling, serving Sherman Oaks, Van Nuys, Encino, and surrounding San Fernando Valley communities. The team handles patching, sanding, priming, and finish painting as part of broader renovation and turnover projects for homeowners, HOAs, and property management companies. You can reach the team at +1-310-890-4885 or request a free online estimate by submitting photos and project details.