

When a New Bathroom Floor Looks Worse Than the One It Replaced
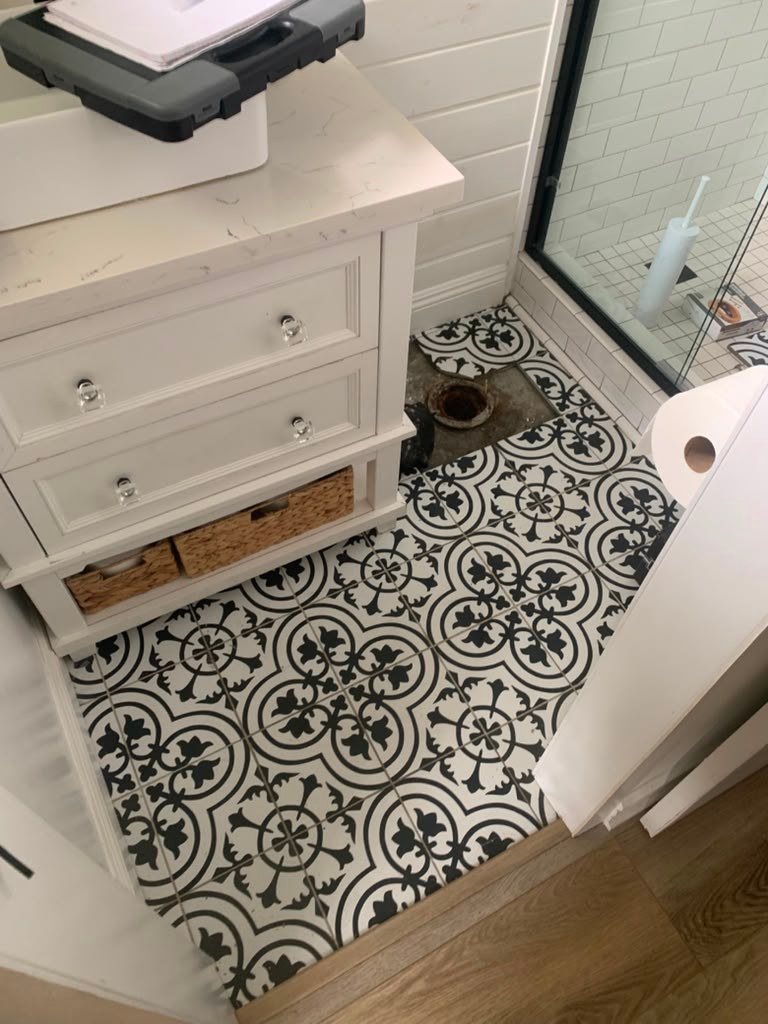
A Los Angeles homeowner contacted us after another contractor installed new bathroom floor tile that was noticeably uneven, with significant lippage between tiles and an unprofessional finish. The floor looked worse than the one it replaced — and this homeowner had paid for a brand-new installation in good faith.
That experience is frustrating in a way that goes beyond money. The disruption of a bathroom project is real, and ending up with a worse result than what you started with is a failure that should never happen.
Our team at Los Angeles Kitchen and Bathroom Remodeling has encountered this type of correction work across Sherman Oaks, Van Nuys, Encino, and throughout the San Fernando Valley. It is not an isolated situation. Poor tile installation is one of the most common remodeling complaints we hear from homeowners who come to us after a previous project failed to meet basic standards.
If you've ever been handed a bathroom floor that looked worse after the contractor left than before they arrived, you already know how demoralizing that is — and you're not alone. As a licensed California general contractor, everything we share here comes from hands-on field experience, not generic construction advice.
What We Found When We Inspected the Failed Tile Installation
The tile material itself wasn't the culprit — that much was clear the moment we walked the floor. Every failure traced back to what happened before the first tile was ever set.
We confirmed hollow spots beneath the tiles — a telltale sign of voids in the mortar bed. Those voids let tiles rock rather than sit in full contact with the substrate, which is how cracking and instability develop over time. We also found significant lippage between adjacent tiles, making the surface uneven to both the eye and the foot.
What told the story most clearly was looking at the grout joints. From one row to the next, the spacing shifted — sometimes subtly, sometimes obviously — because no tile leveling system had been used. Consistent joint spacing requires physical spacers or a clip-and-wedge leveling system at every tile. Without either, joint consistency depends entirely on eye judgment, and that variation compounded across the full floor until the pattern looked visibly off from anywhere in the room.
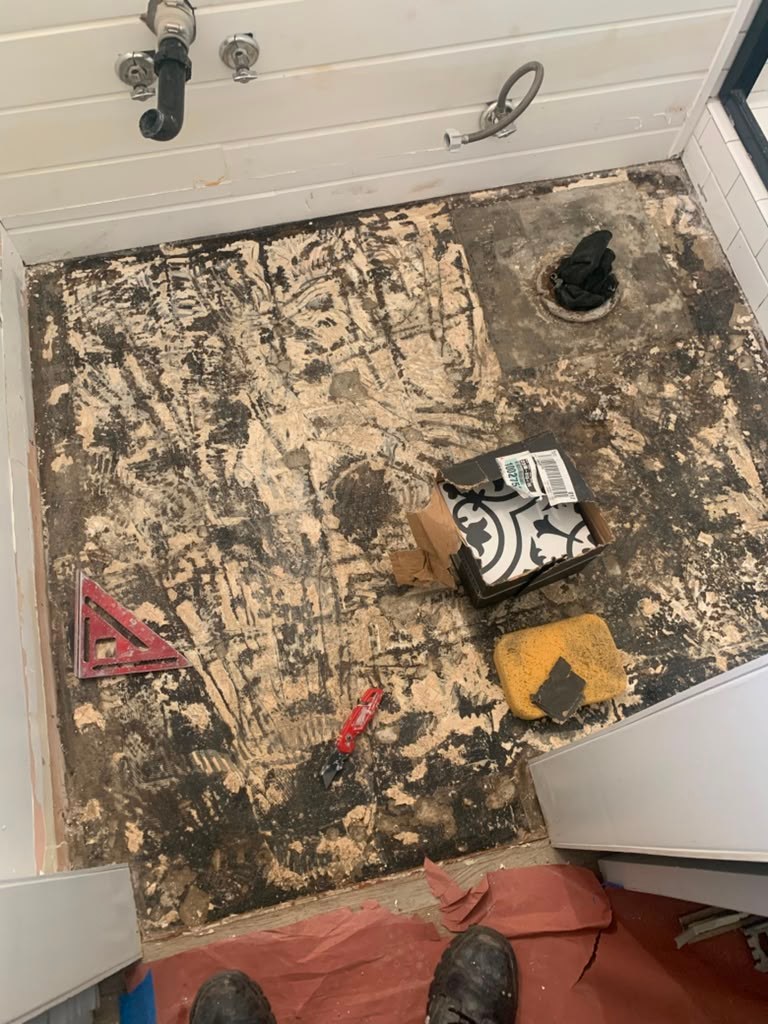
The subfloor showed evidence of uneven preparation beneath the mortar bed, with high and low spots that transferred directly to the finished surface. Patching individual tiles wasn't going to fix a subfloor problem — the diagnosis was that clear. The root cause was foundational, and any cosmetic repair would fail again for the same reason. A full removal and reinstallation was the appropriate path to a result this homeowner could trust.
Why We Removed the Entire Floor Instead of Patching It
In this case, lippage and subfloor irregularity affected the entire floor plane — and replacing individual tiles would have made things worse, not better. New tiles set next to existing ones create mismatched grout lines, height differences at transitions, and color variations where new grout meets aged grout — the repair becomes visible permanently.
Many homeowners wonder at this point whether a full removal is truly necessary, or whether we're simply creating more work. Here's the reality: put new tile over a compromised base and you'll see the same failure within months, because the uneven mortar bed underneath hasn't changed. We would rather add a day of labor now than send someone back in six months to do it again.
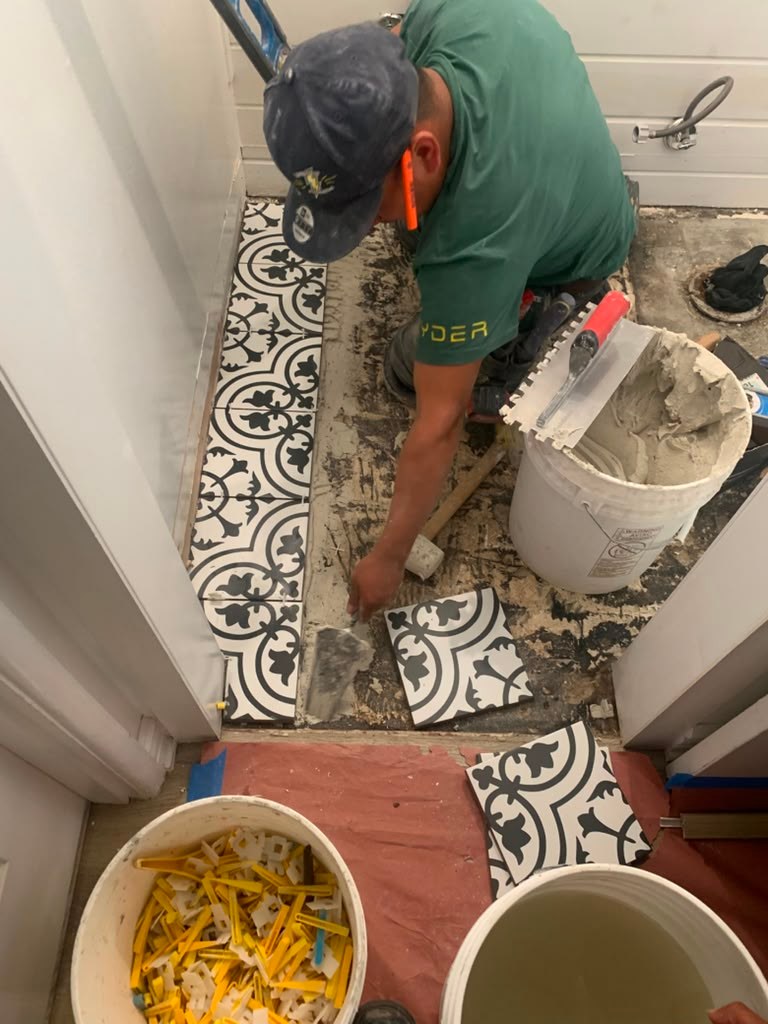
We performed the removal carefully to protect everything around it — baseboards came off first and were stored for reinstallation, the toilet was temporarily disconnected and set aside, and dust containment barriers went up at the bathroom entry to keep demolition debris from spreading through the home. None of the surrounding tile, cabinetry, or fixtures were damaged during the process.
Not every correction job looks like this one. When damage is confined to a small area and the surrounding subfloor is structurally sound, targeted repairs can work — and we've completed plenty of them. But in this project, the failure wasn't localized. Have you ever looked at a damaged floor and wondered whether you're dealing with a surface problem or something deeper? That's exactly the question a hands-on inspection answers — and getting that assessment before committing to either approach saves significant time and money.
The Subfloor Preparation Steps That Make the Difference
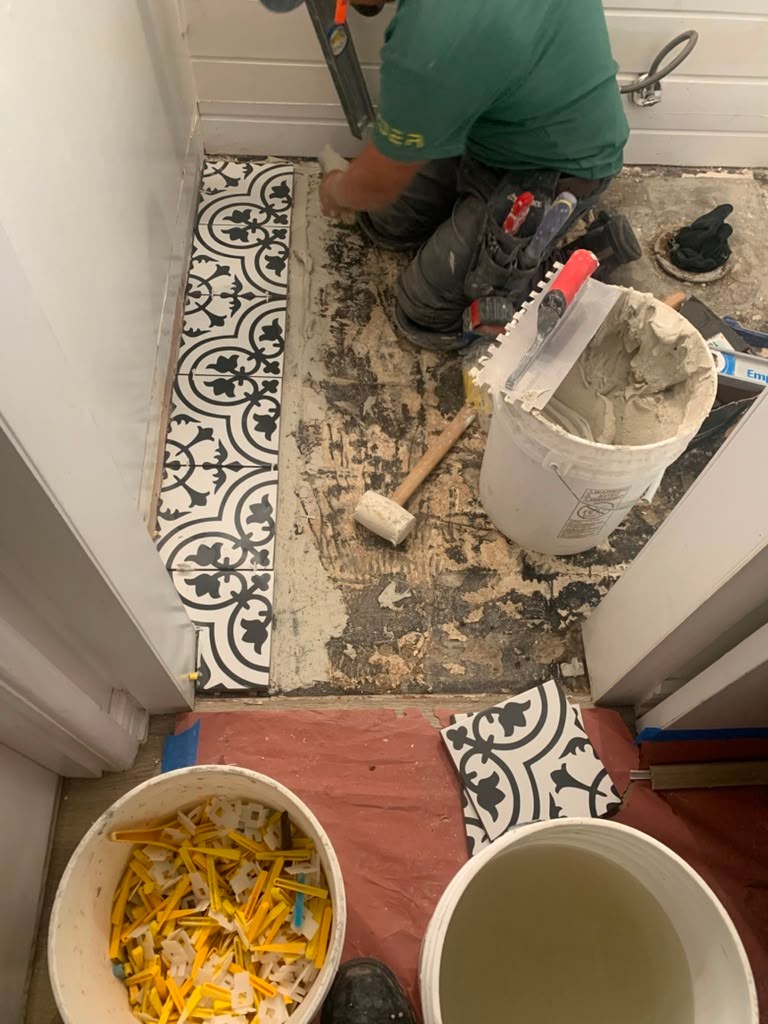
Everything starts with the subfloor — it's the phase most failed tile projects skip entirely, and it's where the real work happens. Once the old tile was removed, our team used a long straightedge across the entire floor plane to map every high and low point before touching a bag of mortar. Any deviation beyond industry-accepted flatness tolerances was marked and addressed directly.
Low areas were filled with appropriate floor leveling compound, and high spots were ground down rather than buried under extra mortar. The compound was allowed to cure completely before any tile work began — cutting that cure time short produces a soft layer underneath and defeats the purpose of the preparation entirely.
Mortar selection matters as much as surface flatness. Large-format porcelain tiles require a polymer-modified mortar applied with full back-buttering on every tile. Spot-bonding — where mortar is applied only in the center or at corners — leaves voids that cause hollow spots, cracking under foot traffic, and eventual tile failure. Full-coverage contact between tile and substrate is not optional with large-format material.
This preparation phase is genuinely time-consuming, which is exactly why it gets skipped when a contractor is under schedule pressure or cost pressure. When you call us at +1 (310) 890-4885 for a free consultation, we walk you through every preparation step before a single tile is quoted — because the floor underneath determines everything that goes on top of it.
How We Installed the New Tile Floor with Precision and Consistency
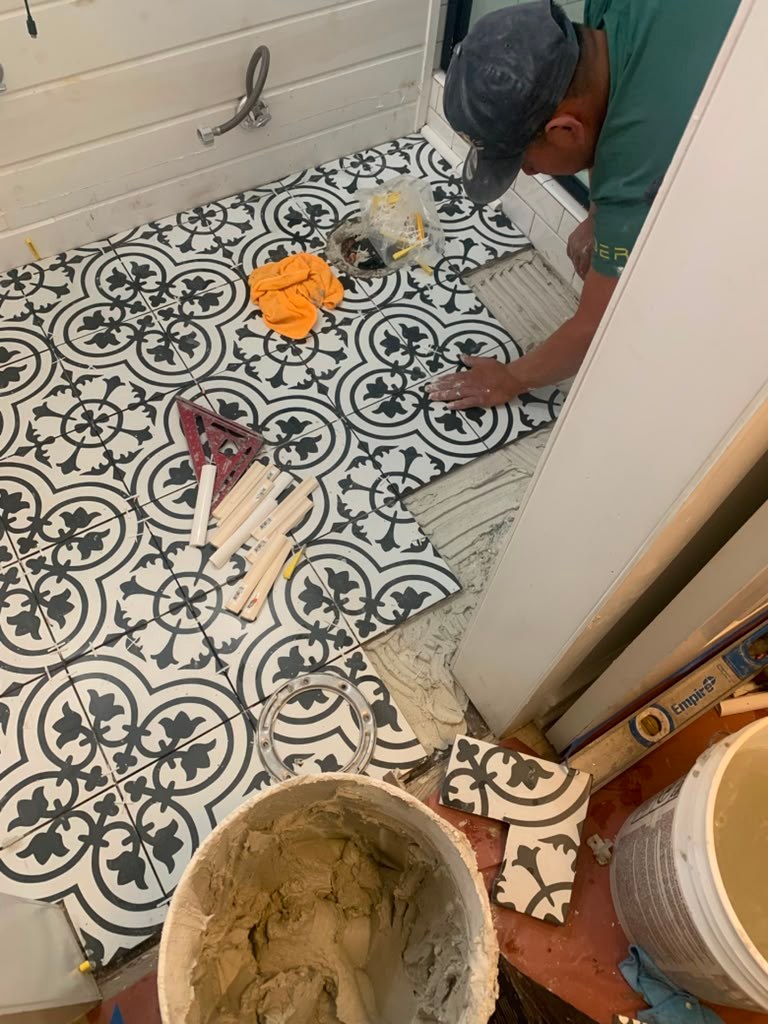
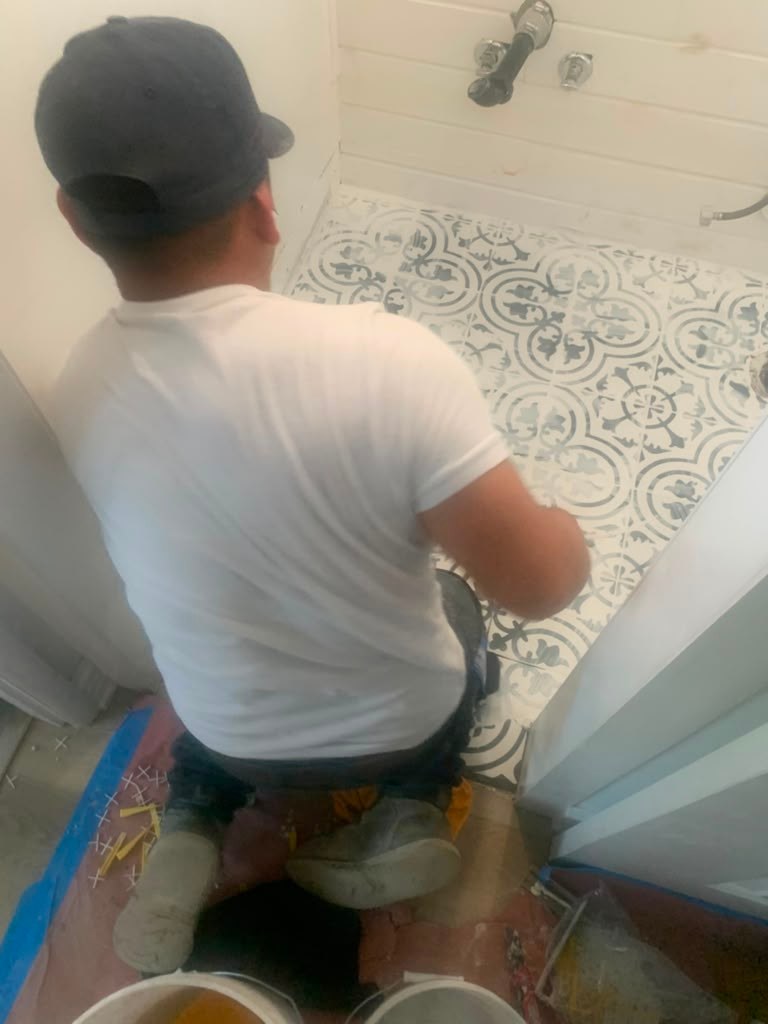
Professional tile installation begins with layout planning, not with setting the first tile. We established a center point for the floor, then dry-laid a full row of tiles in both directions to see exactly how the pattern would land at the walls, vanity base, and toilet footprint. A tile that cuts to a sliver at a visible edge looks unfinished — adjusting the starting point during dry layout costs nothing and saves a result you cannot undo.
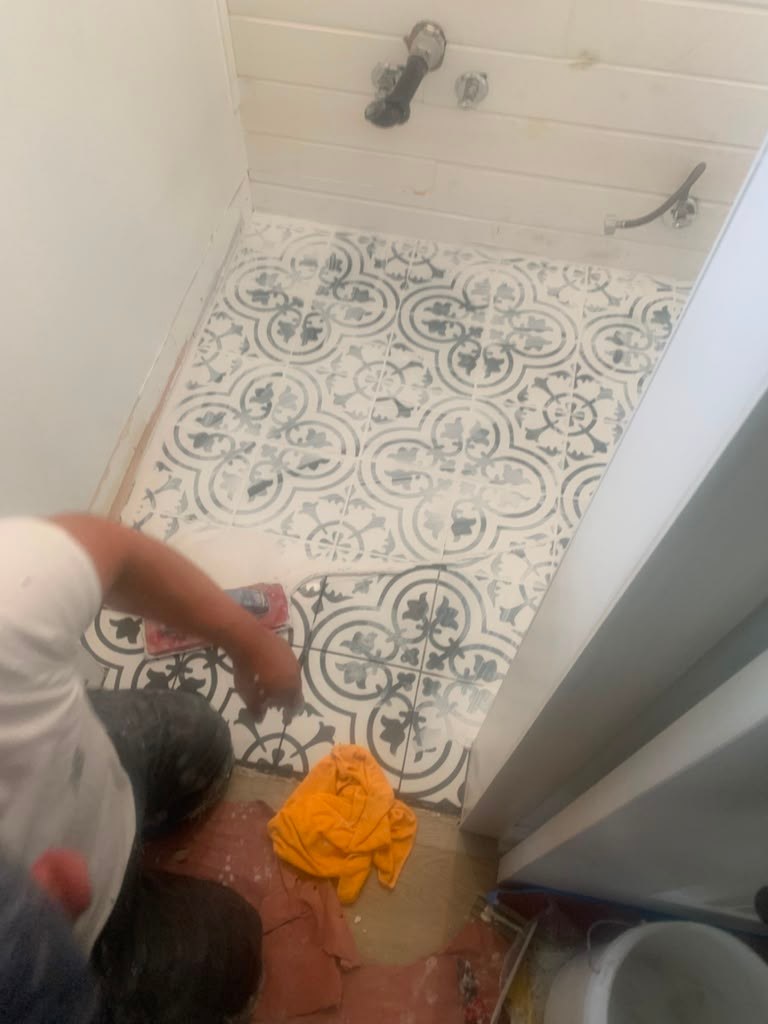
Once the layout was locked, tiles were set using a clip-and-wedge leveling system. A clip is placed at each tile corner before the next tile goes down, and a wedge is driven in to pull adjacent tiles into a consistent plane. This is what eliminates lippage mechanically, rather than relying on an installer's eye alone. After the mortar cured, the wedges were snapped off cleanly at the floor surface.
For grouting, we matched the grout type to the joint width and worked in manageable sections, cleaning haze before it hardened. After the full cure period, every grout joint was sealed against moisture and staining.
The final inspection covered every tile with a straight edge and level run in multiple directions. Each tile was tapped individually to confirm solid contact with no hollow spots. Only after passing that check did we sign off on the floor — and the homeowner finally had the bathroom they paid for the first time.
Types of Tile Flooring Corrections We Handle Across Los Angeles
The correction work our team performs spans every major tile type and failure category, and each material presents its own specific challenges.
Large-format porcelain is the most demanding correction we handle. Large tiles amplify any subfloor imperfection — even minor deviations create visible lippage and hollow voids that cause tiles to crack under normal foot traffic. Full mortar coverage and a mechanically flat substrate are non-negotiable with this material.
Ceramic tile failures typically involve failed adhesive bonds, cracked field tiles, and grout joints that have widened and crumbled from substrate movement. We address the underlying cause rather than re-grouting over a moving base.
Natural stone floors — travertine, slate, and marble — are unforgiving when installed over an inadequately supported substrate. Cracks, staining from moisture intrusion, and structural failures all require careful tile removal and complete substrate rebuilding before new stone can be set correctly.
Shower floors and wet areas represent the most serious correction category. An improperly sloped shower pan traps water beneath the tile surface, eventually compromising the waterproofing membrane and the subfloor beneath it. We assess and replace failed shower floor systems as part of our bathroom remodeling and walk-in shower services throughout the San Fernando Valley, including neighborhoods like Woodland Hills and Porter Ranch.
The Real Cost of Fixing Someone Else's Tile Work
Tile correction projects cost more per square foot than a new installation — and that is not contractor markup, it is math. Before a single new tile is set, the team must demo the existing floor, dispose of the debris, assess the subfloor condition, and address any damage found underneath. You are paying for two installations layered into one project.
A common question we hear is whether the total cost depends on floor size alone. Size is only one variable. Subfloor damage, water intrusion beneath the old tile, the type of replacement tile, and whether any structural repair is needed all affect the final scope in ways that are impossible to predict without seeing the floor in person. A general estimate given without an inspection is not a real number — it is a guess that often grows once work begins.
We cannot responsibly quote a correction project over the phone for this reason. What we can do is come out and give you a clear picture of what you are actually dealing with before you commit to anything. That inspection determines whether a targeted repair is viable or whether full removal — as it was in the project described throughout this article — is the more cost-effective path long-term.
Call us at +1 (310) 890-4885 to schedule a tile inspection before investing in any repair plan. Homeowners across Reseda, West Hills, and surrounding communities have used that first conversation to avoid a second expensive mistake.
What to Look For When Evaluating a Tile Contractor Before You Hire
Choosing the right tile contractor before a project begins is the single most effective way to avoid the correction scenario described throughout this article. The right questions separate skilled installers from those who will leave you with an uneven floor.
Ask to see completed project photos of grouted, finished floors — specifically rooms similar in size and tile format to your project. Staged marketing images tell you very little; a photo of a completed, real bathroom floor tells you everything about consistency and workmanship.
Request references from past clients who had floor tile installed, not just backsplashes or accent walls. Floor installation involves subfloor preparation that vertical tile work simply does not — a contractor with a strong backsplash portfolio has not necessarily demonstrated the skills your floor requires.
Ask directly how the contractor levels the subfloor before setting tile and which leveling system they use during installation. A qualified installer will answer that question immediately and in detail. Hesitation or a vague answer is a meaningful signal.
Verify that the contractor carries a valid California contractor's license and general liability insurance. You can confirm licensure through the Contractors State License Board at no cost. Confirming that the license covers the scope of your specific project takes minutes and protects your investment before a single tile is purchased. Our team at Los Angeles Kitchen and Bathroom Remodeling is happy to answer every one of these questions — call +1 (310) 890-4885 to start that conversation.
Common Tile Installation Mistakes That Lead to Uneven Floors
Most uneven tile floors trace back to one of four preventable errors, and understanding them helps you recognize a problem before it becomes a full replacement project.
Skipping subfloor flattening is the most consequential mistake. Setting tile directly on a wavy or unlevel substrate transfers every high and low point to the finished surface. No amount of care during tile placement compensates for a bad starting surface — the tile simply follows whatever is beneath it.
Using the wrong mortar or trowel size leaves voids beneath the tile. Different tile formats and materials require specific mortar formulations and trowel notch depths to achieve full coverage. Mismatched combinations create hollow spots that allow tiles to flex, crack, and eventually fail under normal foot traffic.
Skipping a tile leveling system on any floor larger than a few square feet introduces lippage that even skilled hands cannot prevent consistently. Mechanical clip-and-wedge systems exist precisely because human judgment alone cannot hold every tile in the same plane across an entire floor.
Rushing the grout timeline is the final common error. Grouting before mortar has fully cured can shift tiles out of plane and weaken the adhesive bond. Cure time varies with mortar type, humidity, and ambient temperature — a schedule that worked on a previous job may not work in a different bathroom environment.
Tile Installation and Bathroom Remodeling Services We Offer Across the San Fernando Valley
Los Angeles Kitchen and Bathroom Remodeling offers a full range of services from our Sherman Oaks office at 4419 Van Nuys Blvd, Suite 407, serving homeowners across Encino, Studio City, Calabasas, and surrounding communities. Tile installation is available in ceramic, porcelain, natural stone, glass, mosaic, and large-format formats for floors, walls, shower surrounds, and kitchen backsplashes — every surface, every material type.
Complete bathroom remodeling encompasses walk-in showers with code-compliant waterproofing systems, tub-to-shower conversions, custom and floating vanities with integrated LED lighting, full layout redesigns, and licensed plumbing and electrical work handled in-house. Homeowners in Studio City and North Hollywood rely on this single-contractor model to avoid the coordination failures that often produce the workmanship problems described throughout this article.
Every demolition phase includes dust containment barriers, floor protection throughout the home, and responsible debris removal — the surrounding space stays clean while the work gets done. Our general contracting service covers permitting, subcontractor scheduling, and inspections from the first consultation through the final walkthrough, giving you one accountable point of contact at every stage.
Call +1 (310) 890-4885 to schedule a free consultation or tile inspection before committing to any flooring project.
Neighborhoods and Areas We Serve Around Sherman Oaks and Los Angeles
Los Angeles Kitchen and Bathroom Remodeling is based at 4419 Van Nuys Blvd, Suite 407, Sherman Oaks, CA 91403 — a central San Fernando Valley location that puts us within practical reach of communities across the region. Our primary service corridor runs along Ventura Boulevard and Van Nuys Boulevard, covering Sherman Oaks, Encino, Studio City, Tarzana, and Calabasas.
Extended coverage reaches Woodland Hills, Reseda, Granada Hills, Northridge, Chatsworth, and North Hollywood — all communities where we have completed bathroom tile installations, corrections, and full remodeling projects. Homeowners in Reseda and Woodland Hills regularly work with our team for both new installations and correction work after unsatisfactory results from prior contractors.
We also serve Los Angeles proper, including Bel Air, Brentwood, West Hollywood, and the Hollywood Hills, where referrals from satisfied clients have brought us into tile correction and full bathroom renovation projects. Homeowners in Hidden Hills and Bell Canyon trust our team for the same high-standard installations expected in those communities. Open Sunday through Thursday from 8 AM to 6 PM, Friday from 8 AM to 2 PM, closed on Saturday. Call +1 (310) 890-4885 to confirm whether we serve your neighborhood and to schedule a free estimate.
Schedule a Free Tile Inspection or Bathroom Remodeling Consultation
If your bathroom floor is showing signs of lippage, hollow tiles, cracked grout, or uneven surfaces, the right first step is a professional assessment — not a guess. Many homeowners who contact us are already living with the aftermath of a poor installation and are uncertain whether they need a targeted repair or a full removal. That inspection removes the uncertainty before any money is committed.
Los Angeles Kitchen and Bathroom Remodeling offers free consultations and free online estimates for every tile and bathroom remodeling project in the San Fernando Valley. There is no financial obligation attached to getting a professional opinion on what your floor actually needs. Send us photos through our online estimate form, or invite us out for a hands-on inspection — whichever gets you the clearest picture fastest.
Call +1 (310) 890-4885 to schedule your free bathroom remodeling consultation or tile inspection before investing in any new flooring project. Open Sunday through Thursday from 8 AM to 6 PM, Friday from 8 AM to 2 PM, closed on Saturday. Our team will tell you honestly what the floor requires — and what it will take to get the result you originally paid for.
Project Photos
Frequently Asked Questions
14 questions answered
How much does it cost to fix an uneven bathroom tile floor installed by another contractor?
The cost to correct a failed tile installation varies significantly depending on the extent of the damage, the size of the floor, and whether a full removal or targeted repair is required. Because subfloor preparation, mortar correction, and full demolition each add labor time, correction projects often cost more than a straightforward new installation would have. Getting a professional inspection before committing to any scope of work is the most reliable way to understand the true cost of your specific situation.
Can uneven bathroom tile be repaired without replacing the entire floor?
In some cases, yes — when the problem is confined to a small area and the subfloor beneath the surrounding tile is sound, a targeted repair can produce acceptable results. When lippage, hollow spots, and subfloor irregularities affect the entire floor plane, however, patching individual tiles typically fails again for the same root cause. A professional inspection is the only reliable way to determine which approach is appropriate before any work begins.
What causes significant lippage between bathroom floor tiles?
Significant lippage is almost always caused by an improperly prepared or uneven subfloor, combined with the absence of a tile leveling system during installation. When high and low spots in the mortar bed are not corrected before tile placement, those height differences transfer directly to the finished surface. Skipping clip-and-wedge leveling systems or tile spacers also allows grout joint widths to vary, which compounds the uneven appearance.
How long does it take to correct and reinstall a bathroom tile floor?
A full removal and reinstallation of a bathroom tile floor typically takes several days from demolition through grouting, depending on the floor's square footage and the extent of subfloor preparation required. Self-leveling floor compound must be allowed to cure completely before any tile is set, and grout requires its own cure period before the floor can be used — rushing either phase undermines the results. Your contractor should give you a realistic timeline after inspecting the subfloor condition.
What is a tile leveling system and why does it matter for bathroom floors?
A tile leveling system is a clip-and-wedge or similar mechanical device placed between adjacent tiles during installation to hold them at a consistent, even plane while the mortar cures. Without one, even a skilled installer can struggle to keep large-format tiles perfectly flush, and any minor subfloor variation gets telegraphed to the tile surface. Using a leveling system throughout the entire floor — not just problem spots — is what produces the flat, professional result homeowners expect.
What questions should I ask a contractor before hiring them for bathroom tile installation?
Ask how they plan to prepare and test the subfloor before setting any tile, what type of mortar they use for the specific tile format you have selected, and whether they use a mechanical leveling system throughout the installation. Request to see completed tile projects similar in scale and material to yours, and ask for references from past clients. Evaluating a contractor's process, experience, and past work gives you a more complete picture of their capability than price alone.
Is it worth paying more for an experienced tile installer in Los Angeles?
Paying for experienced installation is almost always worth it when you factor in the cost of correcting a failed project — which can exceed the cost of doing it right the first time. Subfloor preparation, proper mortar selection, full back-buttering of large-format tiles, and consistent leveling are skills that take time to develop and are rarely visible in a price quote. Homeowners who prioritize craftsmanship and long-term durability over the lowest bid are the ones who avoid paying twice.
What is back-buttering and when is it required for bathroom tile installation?
Back-buttering is the practice of applying mortar to the back face of each tile in addition to the substrate, ensuring full-coverage contact between the tile and the surface beneath it. It is required for large-format tiles and natural stone, where the size and weight of the tile create a greater risk of voids if mortar is applied only to the floor. Skipping back-buttering leads to hollow spots under the tile, which cause cracking under foot traffic and eventual tile failure.
How do I know if my bathroom tile floor has hollow spots beneath it?
The simplest method is to tap each tile firmly with a hard object — many professionals use the handle of a grout float — and listen for a hollow, drum-like sound compared to the solid thud of a properly bonded tile. Tiles that rock or flex slightly underfoot are another clear sign of voids in the mortar bed. If you notice multiple tiles producing hollow sounds, especially across a large area of the floor, a professional inspection can confirm the extent of the problem and identify whether a repair or full removal is appropriate.
What is self-leveling floor compound and how is it used to correct a bathroom subfloor?
Self-leveling floor compound is a cement-based material that is poured or applied over an uneven subfloor surface and flows to fill low spots, creating a flat plane once cured. It is applied in controlled lifts and feathered at the edges to blend with the surrounding surface, and it must be allowed to cure completely before tile installation begins. Rushing the cure time produces a soft underlayer that compromises the entire tile installation above it.
How does a licensed general contractor handle a bathroom tile correction differently from a tile-only subcontractor?
A licensed general contractor can manage every phase of the correction — demolition, subfloor repair, mortar preparation, tile installation, grouting, and fixture reinstallation — under a single contract and with direct accountability for the finished result. A tile-only subcontractor may complete their specific scope but leave subfloor repairs, plumbing disconnection, or fixture reinstallation to separate parties, which can create scheduling gaps and diffused responsibility if something goes wrong. Los Angeles Kitchen and Bathroom Remodeling is a licensed California general contractor and handles correction projects end to end.
What should I do if a contractor refuses to fix poor tile work they installed?
Document the defects thoroughly with photos and written descriptions before taking any action, and review your original contract for warranty language or dispute resolution terms. If the contractor is unresponsive, you can file a complaint with California's Contractors State License Board if the contractor holds a state license. For practical next steps, getting an independent professional inspection and written assessment from a second contractor gives you documented evidence of the defects and their cause, which is useful whether you pursue mediation, small claims court, or simply need to understand your options.
How can I verify that a bathroom tile contractor in Los Angeles is properly licensed?
California contractor licenses are publicly searchable through the Contractors State License Board website, where you can confirm active license status, license classification, and any disciplinary history by searching the contractor's name or license number. Always ask a contractor for their license number and verify it independently before signing any contract. Licensing confirms that the contractor has met the state's requirements, carries required insurance, and is accountable to a regulatory body if disputes arise.
What should I expect during a professional tile inspection before committing to a correction project?
A thorough tile inspection involves testing each tile for hollow spots by tapping, measuring lippage between adjacent tiles with a straightedge, checking grout joint consistency across the floor, and in some cases cutting into a section of the subfloor to evaluate the mortar bed condition beneath. The inspector should be able to tell you whether the problem is isolated or systemic, and give you a clear recommendation for repair versus full replacement before any work is quoted. Los Angeles Kitchen and Bathroom Remodeling offers free consultations — call (310) 890-4885 to schedule one before committing to any tile correction project.